What do you think about most during the football season apart from the game?
Chicken, ribs, wings, burgers… Yes, grill time! So, as the game is near, do you need Weber grill maintenance tips to make sure it runs smoothly on the game day?
With proper care and maintenance, your Weber grill can offer delicious food and also extend its life. In this blog, we offer you some essential Weber grill maintenance tips to make your grill function perfectly for the coming football season.
Need for Grill Maintenance
You might already be noting flare-ups, food stuck, and uneven heating, irrespective of the type or amount of oil you use. These issues come up when you do not maintain your grill. Weber grill needs frequent cleaning not just to keep your grill shiny but also to ensure that the flavor of the food stays intact. Burnt bits and old grease can spoil your food, and grease buildup can cause damaged gas lines, clogged burners, and flare-ups.
Hence, it’s important to maintain your Weber grill so it doesn’t cause safety concerns and lasts longer. Just a few minutes of cleaning time, once in a while, and your grill will perform smoothly for years. So, before you have your football fans home for a feast, are you ready to work on your grill maintenance?
Weber Grill Maintenance Tips Checklist
You don’t have to scrub your grill for hours to keep it clean. All you need to keep in mind are a few basic yet smart habits, which are simple and quick.
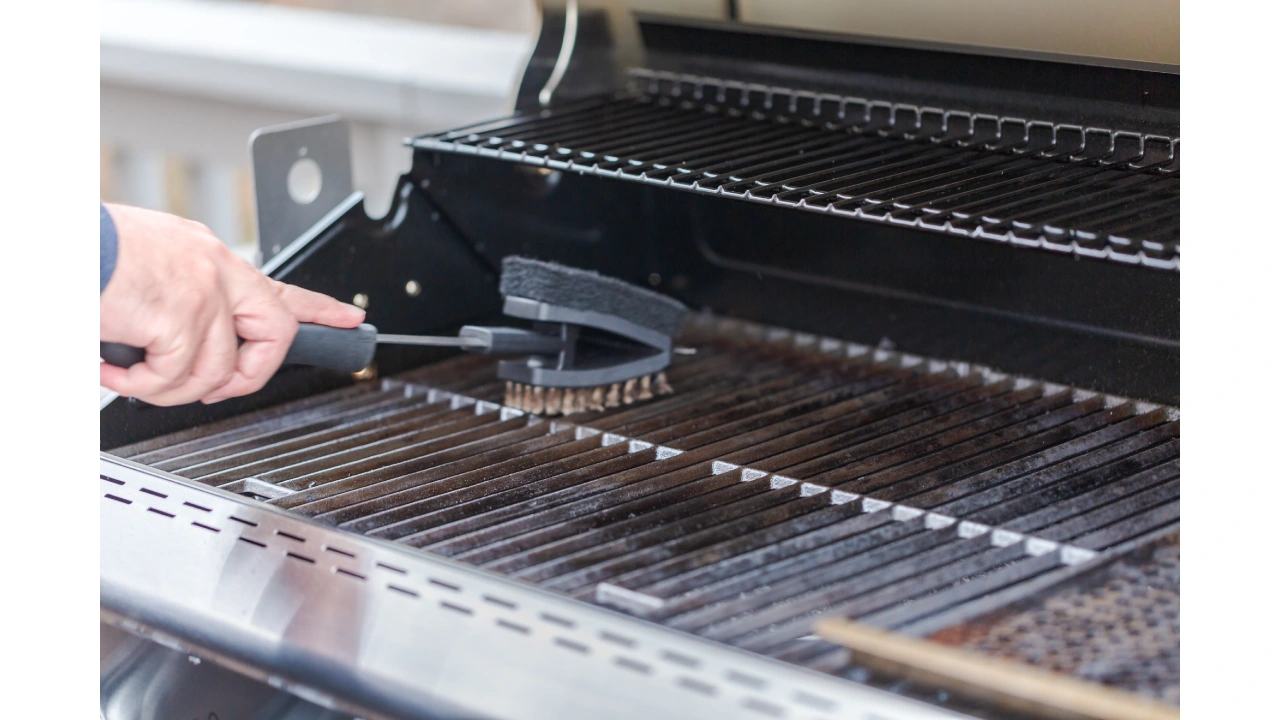
1. Clean grates of the grill
It’s usual to see food sticking on the grates and making them dirty. So, every time you grill and you are done with your party, use a grill brush to scrape off the leftovers stuck to the grates. You can preheat your Weber grill for a few minutes before brushing, so it becomes easy to brush off. This cleaning will prevent excess buildup for the next party season of grilling.
2. Keep the grease tray empty
How often do you check the grease tray? Sure, you don’t remember.
Grease building up on the trays will not only leave a weird smell but also cause frequent flare-ups. Hence, every time you are done grilling, remove the tray, dump the leftovers, and rinse it quickly. This step takes hardly five minutes or even less.
3. Check burners frequently
Do you notice cold spots or even uneven flames when grilling? Well, do it. You might notice the burners blocked either partially or completely. So, keep an eye on them and clean them with a toothpick or brush. Keeping the burners clean also helps in cooking faster.
4. See for connections and gas hoses
A loose connection or cracked hose might mean gas leaks; hence, looking for these things is important for safety. All you can do it, use soapy water on connections and the hose, then try to turn on the gas. If you notice bubbles, it clearly means there is a leak. That’s what’s called a good prevention measure.
5. Clean the lid and exteriors
If your grill is dirty, you are inviting rust. Use either soapy water or a Weber-approved cleaner to wipe away the grill from every corner. This not only gives your grill a good finish but will also keep it fresh for the food.
6. Swap the damaged parts
Do you say it’s okay to have damaged parts as long as the grill is doing its work? If it’s a yes, then you are wrong. It’s important to have new and proper functioning parts on your grill on any day. So, if you notice warped or rusty parts, you should replace them immediately. Weber does have many replacement parts, so you can buy and get them installed.
7. Cover your grill
It might not be a cleaning step but it’s essential to protect your Weber grill from dust and rain. Of course, not to forget the critters. So, keep your grill covered always when it’s not in use so it’s safe and protected.
5 Must-Have Products for Easier Weber Grill Care
If you’re now keen on cleaning your Weber grill, ensure you have toe following products in your basement.
1. Weber One-Step Cleaning Kit

Features:
- Made of aluminum steel, it is resistant to heat damage
- Handle twists help dump ash without mess
- Includes rod, hardware, damper blades
- Improves temperature control and airflow
2. Grillart Grill Brush and Scraper
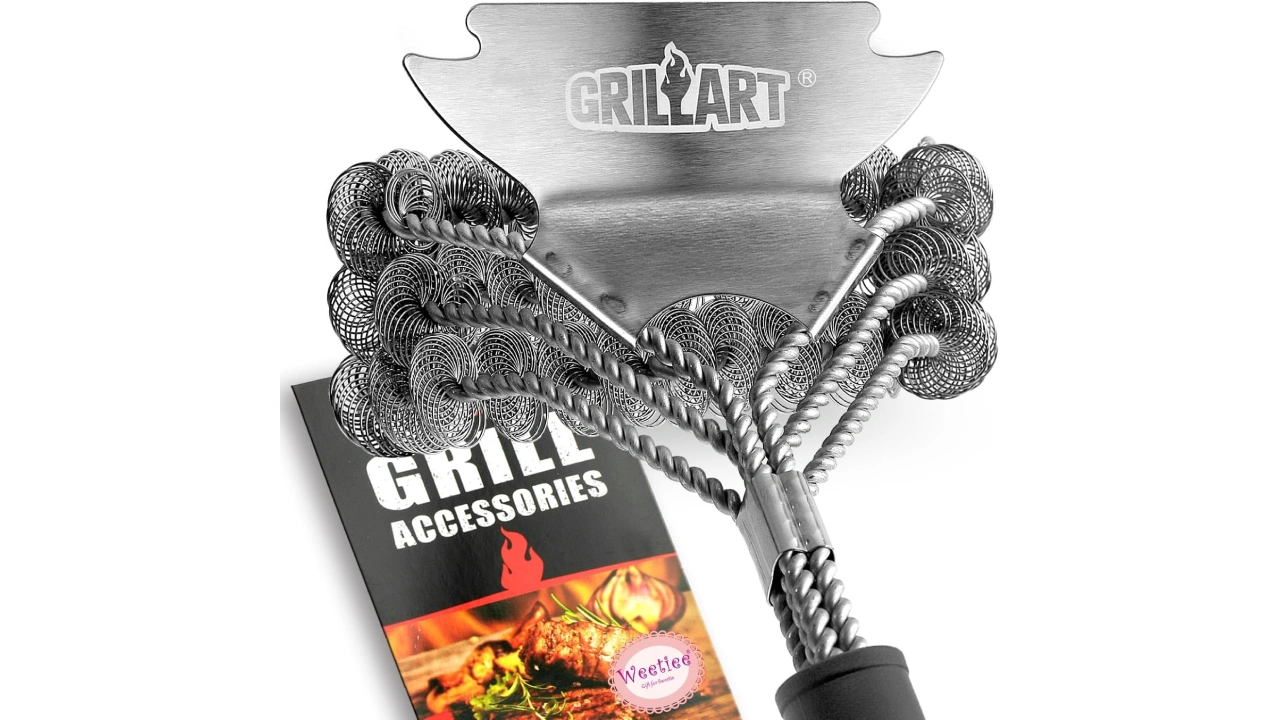
Features:
- Cleaning head – replaceable
- Safe handle made of stainless steel
- Bristle-free design helps with cleaning
- Safe for cast iron, gas, porcelain, and charcoal grills
3. Weber Barbeque Maintenance Kit
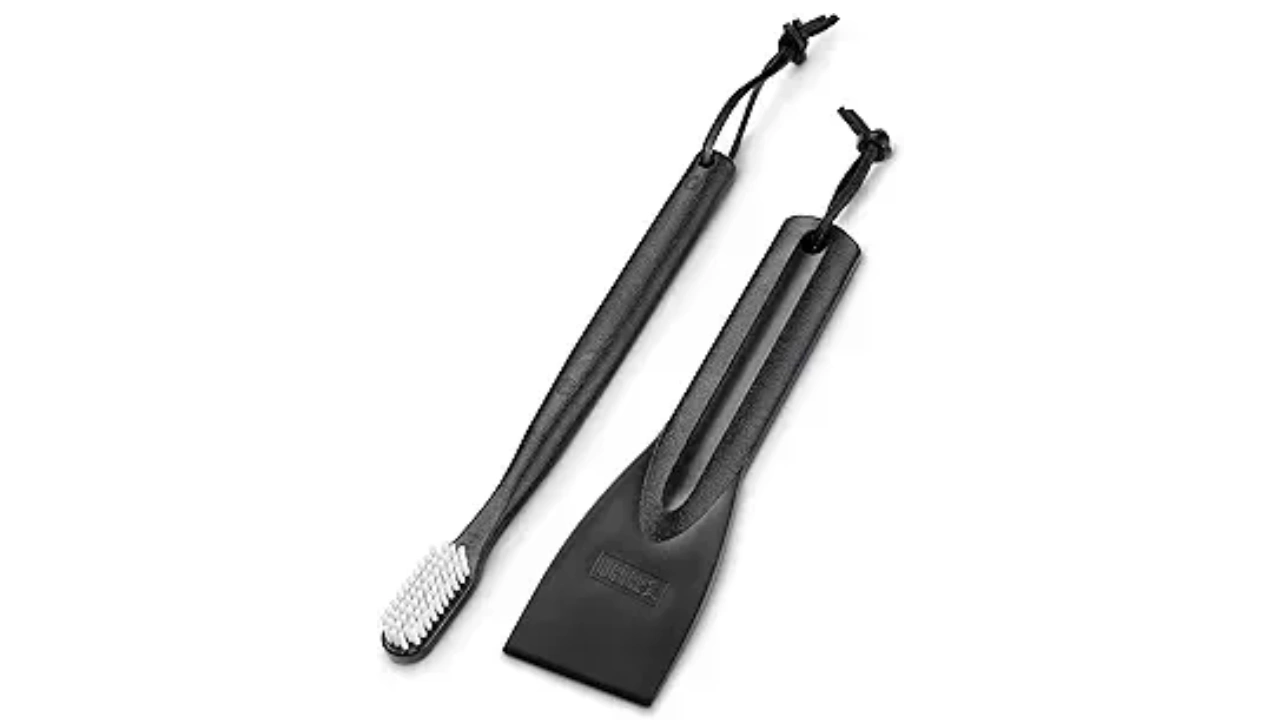
Features:
- Compact
- Helps with deep cleaning
- Made for Weber gas grill
- Comes with flexible brush and cookbox scraper
4. Goo Gone Grill & Grate Cleaner
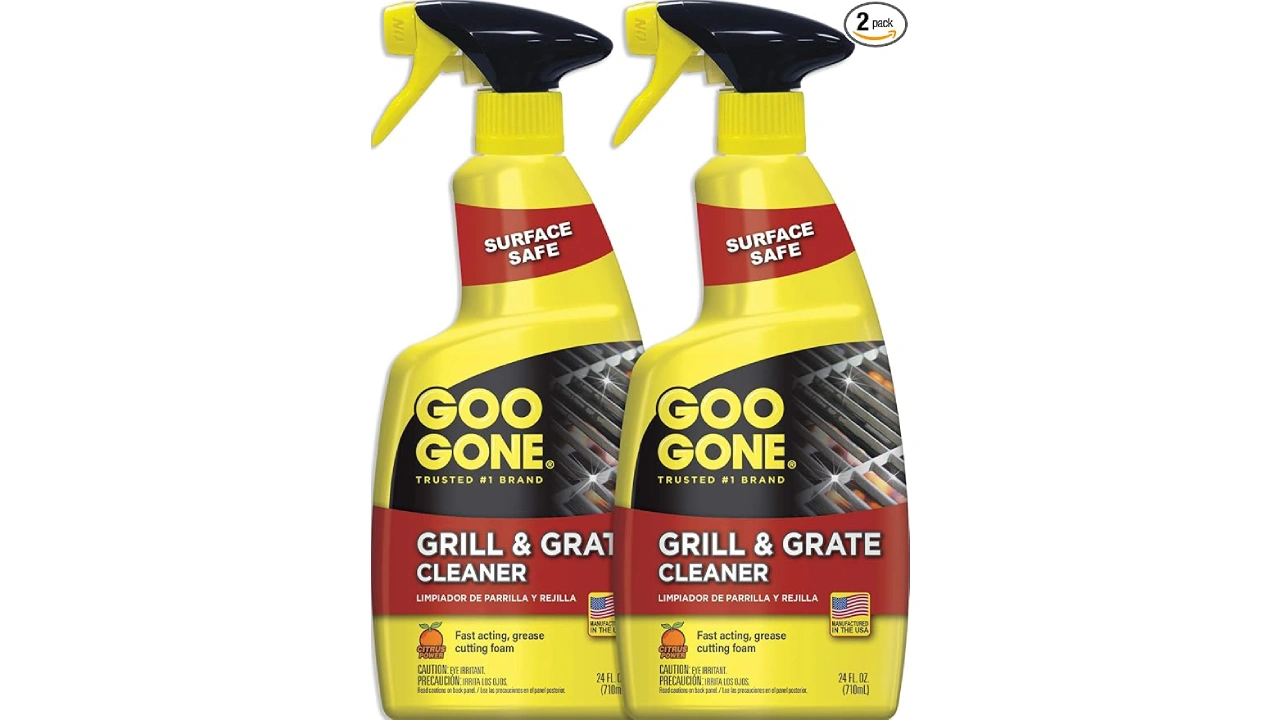
Features:
- Works on smoker, racks, and grates
- Easy to spray with wipe-off formula
- Good to clean carbon and grease
- No need of hard scrubbing
Frequently Asked Questions
1. Is it okay to use household cleaners on the Weber grill?
Avoid using any harsh chemicals on the grill. It is always better if you use Weber-approved degreasers or cleaners, so your grill lasts for a long time and doesn’t rust easily.
2. How frequently should I clean my grill?
It is suggested to clean your grill lightly after every use. However, you can go for deep cleaning once in 3-4 weeks. You can do it more often if you use your Weber grill frequently.
3. Is it a good idea to cover your grill?
Of course, covering your grill with a good-quality cover will protect it from dust, UV rays, and sun, thereby extending its life and cutting down paint or rust damage.
4. How to keep my grill grates non-sticky?
Make sure you drizzle some oil on your grill grates every time you are done with cleaning. This will prevent sticking of food particles and also help to season the grates.
You don’t have to clean your Weber grill every day. But incorporating tiny habits like wiping it off after use, checking the parts timely, and using right cleaners and tools for deep cleaning can make your grill super good to function properly. So, if you’ve already invited your friends and family for the football season, ensure you give your grill a good maintenance check.
